

How To Remove Window Crank House
Paul is a fix-it-yourself homeowner who enjoys finding creative and cost-effective solutions to house problems he encounters.
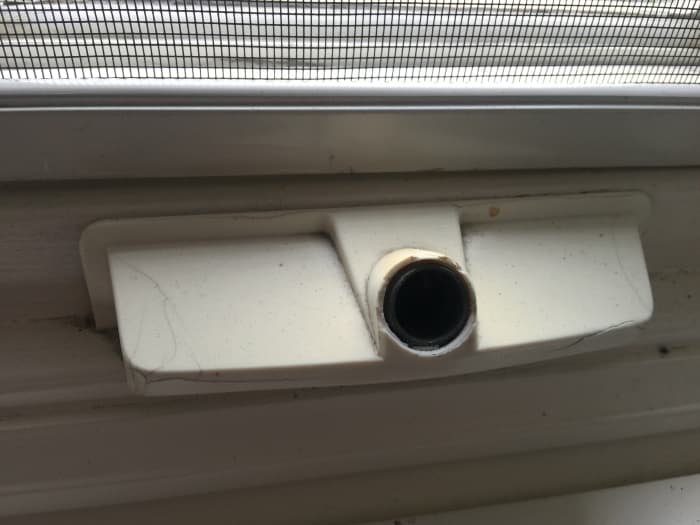
Broken Window Crank
Replacing a Window Crank
In my house, I've recently replaced two window cranks. Before doing so, I called several window companies, and they kept telling me I needed to get new windows. However, I found out that with some basic tools and a little research, it's pretty easy to replace a window crank. This is how I did it.
Finding a Replacement Crank
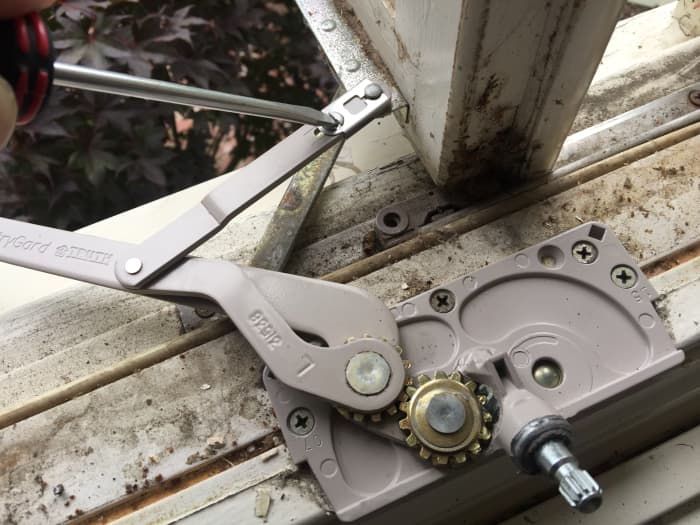
The inner part of my window crank broke. I have a dual-arm crank. I measured the arms, exposed the window crank, and found out what brand of window crank I have. Mine are Truth cranks (I ordered my replacement from Alco Supply), but if you can't find the exact brand that you have, you can still find a replacement and repair your window crank by measuring
- each arm (if one arm has a hinge, measure that piece as well).
- the dimensions of the crank base (to ensure a replacement will fit in the window board cutout).
Now that I know the brand and the arm length, I found an online distributor and ordered the part. If you still aren't sure on what to order, take a picture of your crank and email it to a supplier (the folks at swisco.com can help find replacement parts if you can't find the brand you need). There is a good chance they'll know what you need as a replacement.
Also note that window cranks with dual arms come in left and right options. Looking at the window from the outside and identifying which side of the window has the hinges determines if you need a right or left crank. If the hinge is on the left looking at the window from outside, a left crank is needed.
Replacing a Broken Window Crank
The first step is to use a flathead screwdriver and pop off the plastic crank cover.
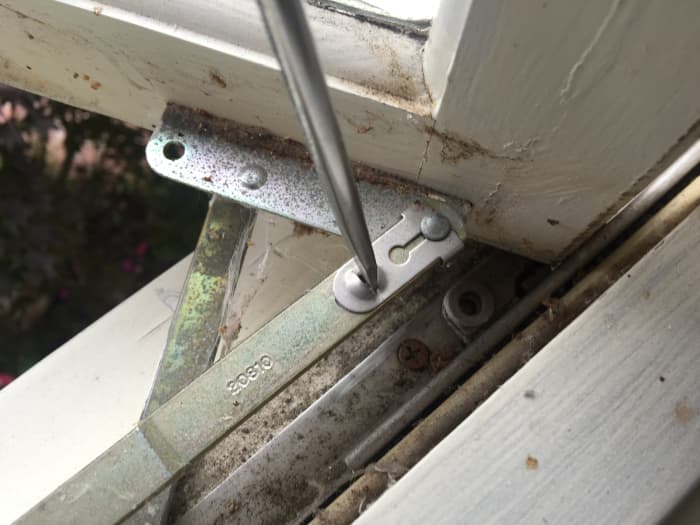
Unhooking the Arms of a Window Crank
The second step is to use a flathead screwdriver to unhook the arms of the crank from the window.

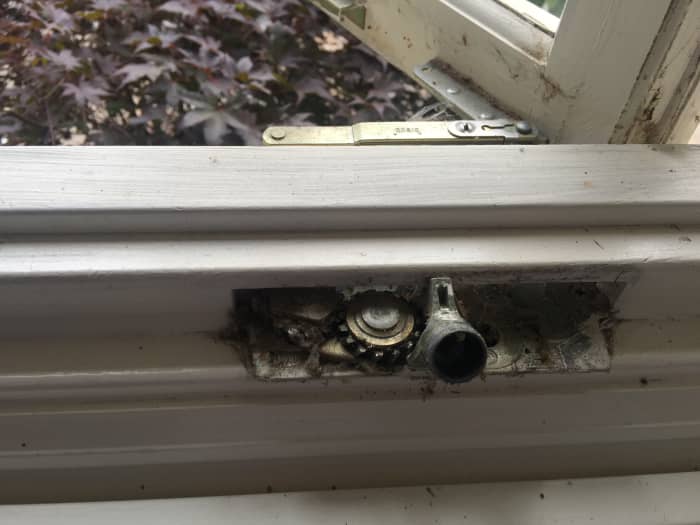
Removing Part of the Window Frame
The most difficult part of replacing the crank is removing the part of the window frame to expose the screws to the crank.
In this step, I used a small crowbar, a pair of wire cutters and a block.
Check around the piece of wood that is cutout around the crank for finishing nails. If you try and pry out the board with the finishing nails still securing the board, there's a good chance the frame will crack. If you can see nails, either remove them or cut them with wire cutters before trying to remove the board covering the crank.
On my wood windows, I cut the nails. There were three nails, glue, and paint securing the board. After the nails were cut, I took a small crowbar and a block to pry up the board.
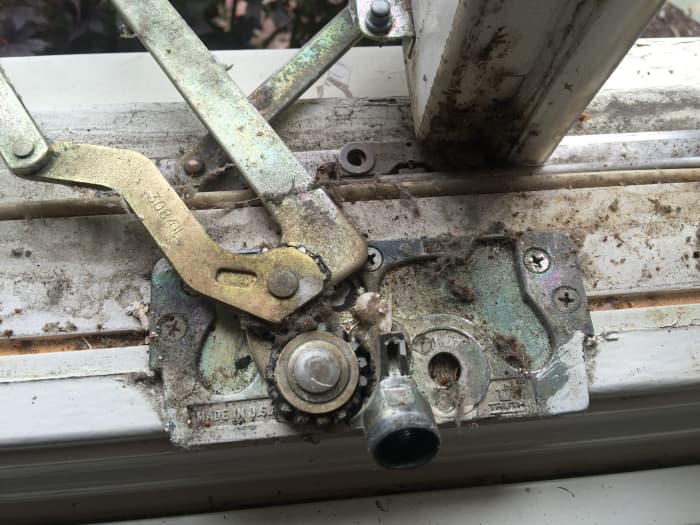
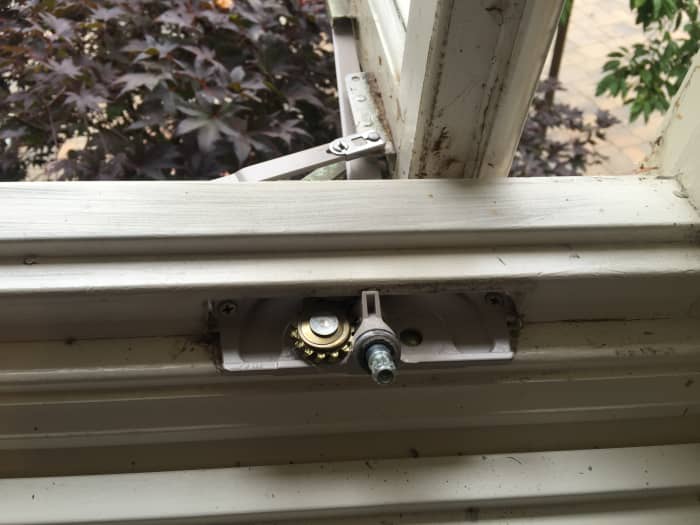
Unscrewing a Broken Window Crank
Now that the board has been removed, unscrew the old crank.
Installing a New Window Crank
After the old crank has been removed, put in the new one. Since I found an exact replacement, all I had to do was screw in the crank using the previous holes from the old crank.
After it's screwed in, attach the arms to the window and test the crank. If it all works well, move on to the next step.
Almost Ready to Put the Arm Back on My Window Crank
The next step is putting the board back on to cover the crank. Since I cut the nails and didn't want to risk splitting the board by nailing it again, all I did was take my block (to protect the wood from the window), placed it on the window board, and with a hammer, tapped the board back into place.
Since my board fit so snuggly, it didn't need glue or anything else to hold it in place. However, if the board is loose, use glue or very small finishing nails to secure it.
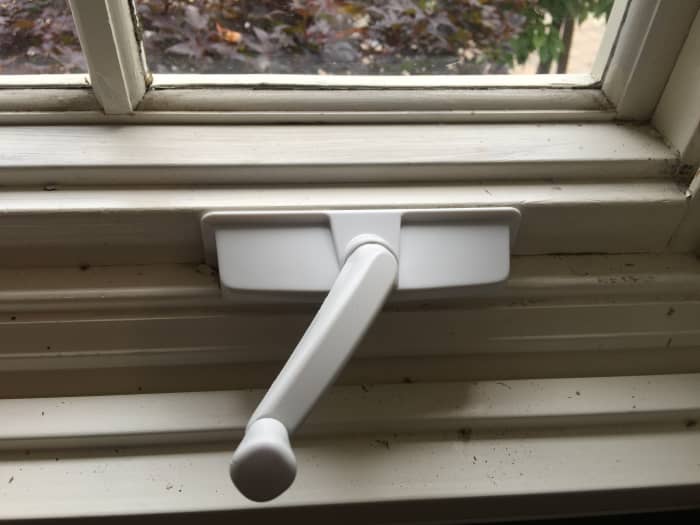
My New Window Crank!
The last step is to put the faceplate on by snapping it in and then putting the handle on the crank.
This project took me about 30 minutes and now I have a window that easily opens and closes.
This article is accurate and true to the best of the author's knowledge. Content is for informational or entertainment purposes only and does not substitute for personal counsel or professional advice in business, financial, legal, or technical matters.
thatgrrl on January 05, 2018:
Years ago, when we had people coming through the house to look at the basement apartment, someone stole all the window cranks in our kitchen. Just the arm part not the entire thing. I've never understood why. But, it has been a nuisance ever since. I do some home repair and this looks like I could manage it fairly well. Thank you for the post. I've become used to dealing with the windows as they are, just leaving them closed all the time. In summer it will be lovely to fix this and have windows open again.
gehreha@celgene.com on June 30, 2017:
thank you
Paul Edmondson (author) from Burlingame, CA on May 31, 2016:
I think the cranks have been broken for about six years. I called a few window companies and they all told me that I'd have to replace the windows if I wanted to get the cranks working again. For about $40 a crank, some research, and just a bit of time, I was able to repair them.
C D from USA on May 31, 2016:
All that in just 30 minutes? That's cool. With all my thumbs, it would've taken me at least two hours to do the job, plus three years to even get around to it in the first place =)
Larry Rankin from Oklahoma on May 29, 2016:
Very useful:-)
How To Remove Window Crank House
Source: https://dengarden.com/home-improvement/How-to-Replace-a-Broken-Window-Crank
Posted by: eatonbothe1945.blogspot.com
0 Response to "How To Remove Window Crank House"
Post a Comment